Monday, March 28, 2011

Buffing and Such: Last week in the studio.

It's that time of the week again, Monday! I'm fresh eyed and bushy tailed and looking forward to another productive week in the studio. So here's what I got up to last week.

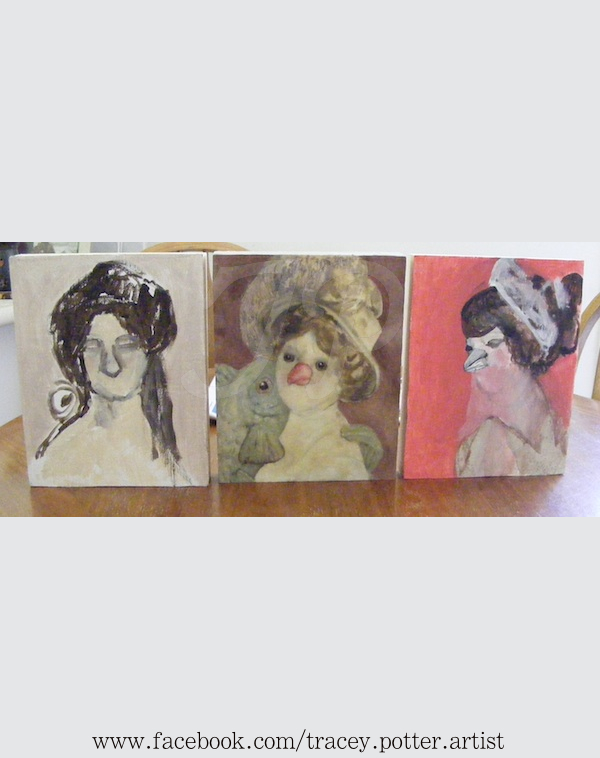
I adding some coloured wax to the background to 'My Prince Charming' and did a little bit more detailing on 'Fish Whispers' (image below). I like how the pink comes through the blue on the background of prince charming.


I also got a lambs wool polishing attachment for my drill to buff the wax to a sheen. I coated a layer on un-coloured encaustic medium over my 'Fish Whispers' painting and that when well, I then decided to put a second coat of wax on and just when I thought I was getting used to working with encaustic, I stuffed up the fusing and had to do a lot of repainting. I managed to bring the painting back and then gave buffing a go.


Also last week, thanks to Pinterest, I came across the images of Hendrik Kerstens, he reference dutch portraiture in his images. He is so clever, his work is classic, yet original, something I'm striving for with my art practice. At first I thought they were oil paintings, what about you, did you?


Kerstens said, “One day Paula came back from horseback riding. She took off her cap and I was struck by the image of her hair held together by a hair-net. It reminded me of the portraits by the Dutch masters and I portrayed her in that fashion. After that I started to do more portraits in which I refer to the paintings of that era. The thing that fascinates me in particular is the way a seventeenth-century painting is seen as a surface which can be read as a description of everyday life as opposed to the paintings of the Italian Renaissance, which usually tell a story. Northern European painting relies much more on craftsmanship and the perfect rendition of the subject. In this, the use of light is instrumental.”

Image and words sourced from Beautylabny's blog.


Some link love:

Basic Encaustics Techniques
http://encausticartist.com/general/encaustic-basics/

 The Collective Store on Bris Style's Blog
http://brisstyle.blogspot.com/2011/03/shop-handmade-collective-store.html

I was mentioned on Niceties Blog
http://www.niceties.co.nz/2011/03/tracey-potter.html


Wishing everyone a productive week!


Come visit me on Facebook: http://www.facebook.com/tracey.potter.artist

Monday, March 21, 2011

Last Week in the Studio.

Last week was a busy one, as they almost always are. I worked on the presentation of some paintings, ones that were heading off to new homes, ones that were going to The Collective Store for Wynnum Up Late and I also did some further investigation into painting with wax.

Last week I bit the bullet and made some coloured hot wax to paint with, up until now I was just using medium (Beeswax + Damar).  I'm really enjoying the translucent quality and sheen of painting with beeswax and Damar. Painting with coloured wax is quite amazing, I can't really describe what it's like, but its so immediate, yet can be reworked with heat, it can be scratch into and buffed, the possibilities seem endless. It's unlike anything I've worked with before.


To colour the wax I'm using oil paint which is added to the hot medium. I found a dutch pancake maker at the op. shop which makes a perfect palette. It does not have a temperature control, but I've worked that if I turn it on for 20 seconds that the plate gets hot enough to melt the wax but not too hot to create fumes, this lets me work with the wax for a while.  Once the wax starts to thicken and set I turn the heat back on for another 10 seconds. 


I received a comment last week about my studio work space being so tidy.  I'm an artist that usually has things everywhere, items placed on top of other items, in the past I have not kept my working space all that tidy. But working with wax, I decided to take charge and make a place for everything in the bookcases and at the end of the day I put all my things away, so I can have a nice fresh start the next day. It seems to be working well. I'm hoping to keep this practice up.


Here are some closeups of my work with wax: I really like how the texture of the linen is showing through the wax. I also like how the wax melts together and blends in areas.


Some helpful and inspiring links I looked at last week:

Chasing Purple Dreams on Facebook
http://www.facebook.com/ChasingPurpleDreams

All Things Encaustic on Facebook
http://www.facebook.com/pages/All-Things-Encaustic/132050906863592

Ezshwan Winding - Encaustic Artist (You Tube Video)
http://www.youtube.com/watch?v=47EXuxNhHlw&feature=player_embedded 


Wishing you a productive week!


Come say hi to me on Facebook: http://www.facebook.com/tracey.potter.artist

Monday, March 14, 2011

Last Week in the Studio

Last week I did further investigations into Encaustic painting, both in theory and practice. I also finished the acrylic under painting of 'My Prince Charming' and coated it in two layers of fast drying clear oil paint.  I'm adding the layers of oil to the surface before I put wax on because acrylic is not absorbent enough for the wax to adhere to. I want my images to be archival and done correctly so they can last a very, very, very long time.


I also got myself an iron and played around a with using it to fuse and flatten the surface. The iron is great for pushing colour into the groves that have been scratched into the surface. 'Fish Whispers to Bird Lady' is coming along nicely, as you can probally see I am slowly adding detail to the image, but I'm still not ready to call it finished.


Once the oil was dry on both pieces and my fish painting had been fused, I added a layer of encaustic medium to both my fish and frog paintings and smoothed the surface using the iron, now to get into the surface and scratch in detail and add some oil.


At the end of the week I backed a few paintings, two from the famous bird series (which are going to new homes this week) and two blank ones for painting on with encaustic. Backing a painting on board involves cutting wood on a 45 degree angle and gluing it onto the backs of the board. Here is a full description of how I mount a board ready to hang. Below is a photo of the books weighing down the backing overnight and also a photo of the backing before they are painted white.


Here are a few helpful links that I've discovered last week:

- Tips on using a heat gun: http://encausticartist.com/hot-tools/using-heat-guns-with-encaustic-101/

- Applying Encaustic Medium and Fusing with heat gun, as well as great technical information:  http://www.youtube.com/watch?v=eA5mmGij9ps&feature=related

- Fantastic box making video, specifically for displaying, presenting and transporting encaustic painting. Can be used for acrylic or oils too. I'm thinking this is something to keep in mind and implement for my studio: mms://video.vcu.edu/agower/Packing_and_Shipping_by_Rodney_Thompson.wmv


I hope everyone has a great week, that is productive and fun filled.


Come visit me at www.facebook.com/tracey.potter.artist

Monday, March 7, 2011

Last Week in the Studio - Fusing and Adding Resin to Wax.


Last week was another huge learning curve for me in terms of encaustic painting!


I have been learning more and more about the art of using wax in my painting and gaining knowledge about the techniques and correct procedures for encaustic painting.  Last week, thanks to some helpful advice and guidance by Kylie Marie Stevens from Chasing Purple Dreams. I discovered the term fusing and encaustic medium and also further investigated the use of Acrylic with wax.


As I mentioned last week some people say yes to using Acrylic with wax, and others say not to mix them.  I've decided to air on the side of caution and I got my oils out this week! I will still do my under painting in acrylic and add a layer of clear oil before adding wax to the painting. This way the wax has something absorbent to adhere to. 


Here is what I found out about Fusing:
Fusing is an essential part of the encaustic process, it ensures that each layer of wax or group of brushstrokes is securely attached to the ones beneath them. Without fusing you have the encaustic version of phyllo pastry—lots of delicate individual layers. This video explains the different tools that can be used, which are a blow torch, an iron and a heat gun. I went out and got a heat gun last week and did my first fuse!  I ended up with a huge puddle of wax on the surface of my painting, as I am still getting used to using the gun and working with wax.


Here's what I found out about Encaustic Medium:
The week before last, I was just using melted beeswax on my paintings and there was some concerns about the longevity of using beeswax in my paintings, especially in the heat of a Queensland summer. I had massive fears of the image melting while it was hanging on the wall. I found out that Encuastic artist add Dammar Crystal (resin from tree sap) to the beeswax to harden the wax (it also gives the surface an added sheen). The usual ration of Beeswax to Dammar is 8-1. The more dammar you add, the harder the wax and higher the melting point. But more than one part of dammar in four parts wax will make the wax too brittle, while using just a few crystals will have a negligible effect on the wax.1 Here is a great video on making Encaustic Medium. So with this information in hand, I went out and got a kitchen scale and some dammar and did my first coat of Encaustic Medium.


I also backed two other painting with thick wood ready for when I'm up to painting with wax. The image on the left and the right below will be worked up in acrylic and then coated with oil ready for the wax. 


This is where I am up to with my first painting 'Fish Whispers to Bird Lady' I still have more to do on this painting. Though I'm yet to finish a painting using this new (to me) method, I feel like I have progressed in leaps and bounds. And I'm loving the translucent quality encaustic is adding to my paintings.


Have a productive week all!


 1. http://www.mariajoao.info/tutorials_files/encaustic/encaustic.htm 

Come say hi on facebook: http://www.facebook.com/tracey.potter.artist


Saturday, March 5, 2011

Featured Artist at Vintage by Lou Lou

                               
I am very honored to have some of my work at Vintage by Lou Lou at the moment!
Here are some photos and the details of the show.


                               Date:                    10 February 2011 -onwards

                               Time:                   
Monday to Friday, 9.30 am to 3pm.


                               Location:             Boutique - 9 Harlin Road 
                                                           Ipswich, Australia, 4305     
                         
                             Website:                http://www.vintagebyloulou.com
                             Facebook Page:   
http://www.facebook.com/pages/Vintage-by-LouLou/184027407538?sk=info

                              Map: 


AMENDED: Please note exhibition has ended.